HOW TO DO GRASSHOPPER POSE
HOW TO DO GRASSHOPPER POSE
When practicing more advanced postures, it’s important to note that just doing the steps leading up to the posture is very beneficial. For example, just stopping on step 2 here would yield results. So would stopping on any of the steps.
Practice and progress as you feel comfortable! Save this for your personal practice (even if you want to try later) and tag a friend who would benefit 🙏🏻❤️
Read below for more details • HOW TO DO GRASSHOPPER POSE •
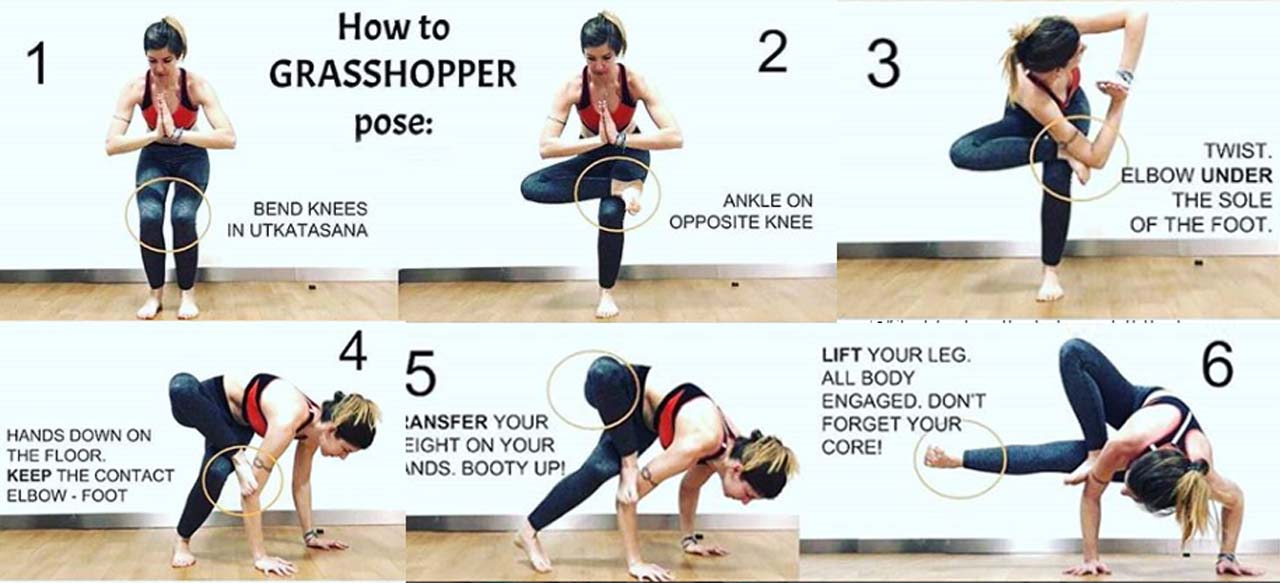
Follow step by step all the instructions to construct a solid base for your grasshopper pose.
1️⃣ Bend your knees + prayer hands in utkatasana
2️⃣ Place your ankle on the opposite knee
3️⃣ Twist. Place FIRMLY your elbow under the sole of the foot. Same side.
4️⃣ KEEP this contact! Hands on the floor.
5️⃣ It is not about strength, it is about transferring your body weight on your hands. BEND ELBOWS, booty up!
6️⃣ Start finding the balance. Lift the leg straight.
❌ Lose the fear of falling, you have to go down with the face, almost kissing the floor.
 The most important element of trying any yoga pose is the observed detail. What happened in your mind and body when you were in this shape? If you didn’t get your left foot off of the floor, but you noticed how brave you were for hovering your face so close to the ground, then you’ve benefited! What matters is the experience. Not aesthetics.
Benefits of Grasshopper Pose:
- Strengthens the wrists, triceps, and quads.
- opens the groin.
- stimulates the digestive system.
- Focuses on the mind.
- Increases self-esteem and/or humility.
- It gives you a reason to come back to your mat.
Recent Comments